Introduction
Are you interested in taking your images and renders to the next level?
Well, you’re in luck because Midjourney AI is here to help you enhance and elevate your existing visual content, whether it’s photos, renders, isometric drawings, or any other type of imagery.
In this article, I’ll walk you through how to modify an image in Midjourney by adding more details and artistic touches, breathing new life into them.
What is Midjourney?
Midjourney is a remarkable image generator that transforms your text descriptions into stunning images.
Using advanced AI technology, it brings your imaginative ideas to life.
This image generator is one of the new kids on the block in the world of AI, joining the ranks of big names like DALL-E and Stable Diffusion.
What’s cool is that you don’t need any fancy equipment or software to use it; it operates right through the Discord chat app.
How does it work, you ask?
While we don’t have all the secrets, it relies on large language models and diffusion models, using your text input to create visual masterpieces by gradually transforming random noise into art.
While it’s not entirely free, the results are often incredibly lifelike, sometimes even fooling experts.
So, if you’ve ever wished to create pictures from your mind, Midjourney is your solution.
How to modify an image in Midjourney?
To get started with mid-journey AI, you can follow these simple steps:
Step 1: Accessing MidJourney
The initial step in your image transformation journey is to access the MidJourney platform or the MidJourney bot, often utilized through Discord, a popular communication tool that many in the MidJourney community prefer.
Once you’ve accessed this platform, you’re ready to begin the process of image enhancement.
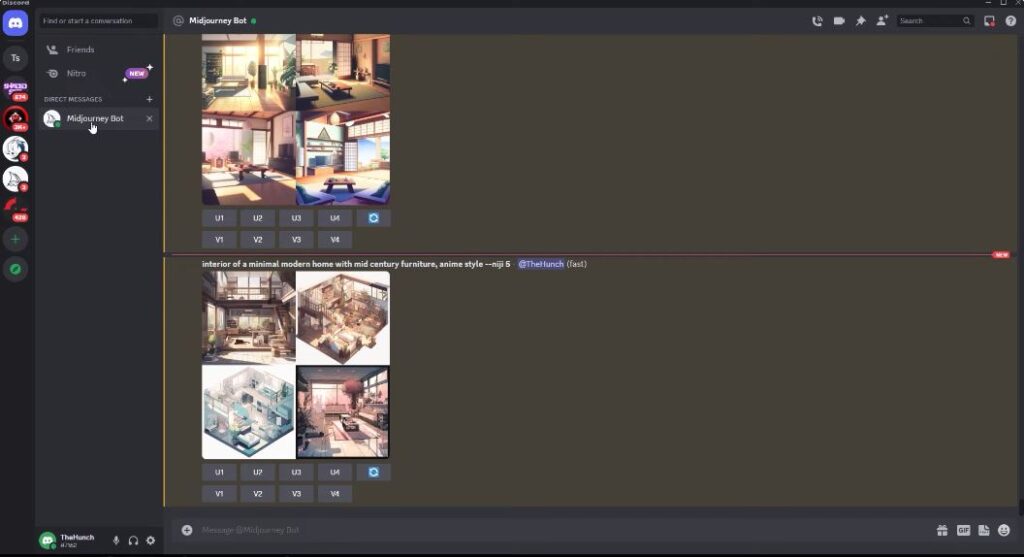
Step 2: Uploading the Image
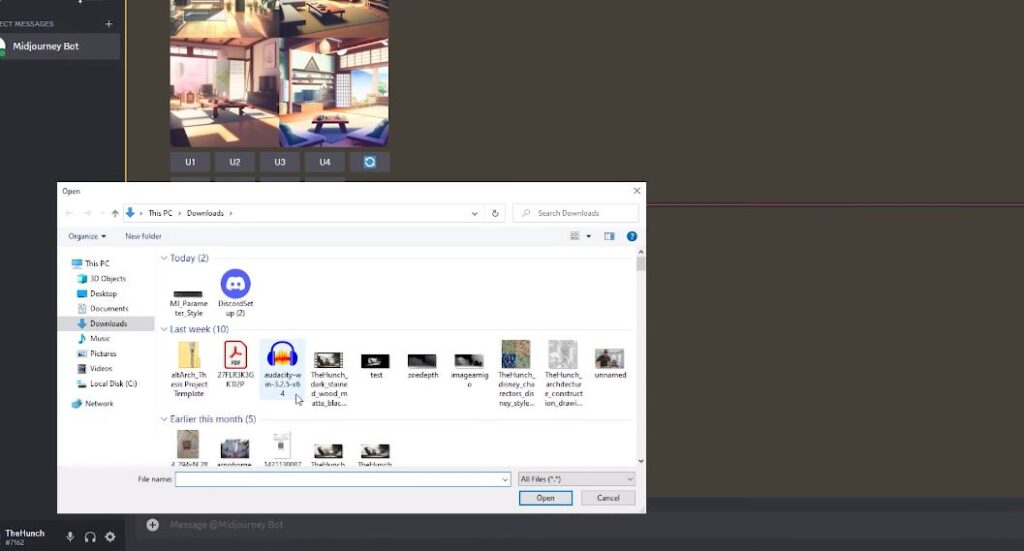
Once you’re within the MidJourney server or in a direct message with the MidJourney bot, the next step is to upload the image that you intend to modify. Here’s a step-by-step guide:
- Click on the “+” icon to initiate the file upload process.
- Select the image you wish to transform from your local device.
- Click “Open” to commence the upload.
- This will make your chosen image accessible and ready for the modification process.
Step 3: Utilizing an Image URL
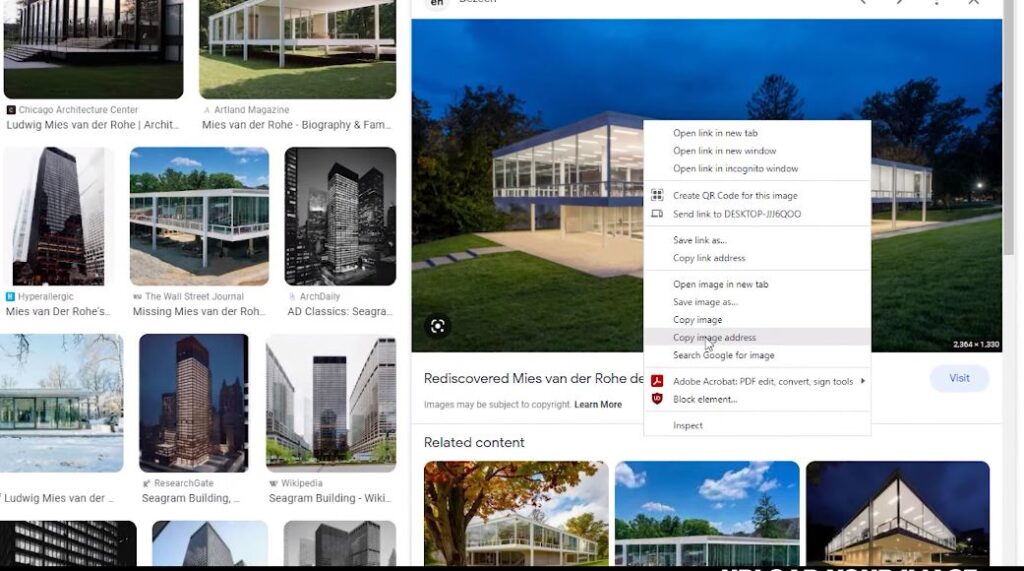
For situations where you wish to modify an image that’s already available online, follow these steps:
- Right-click on the image in your web browser.
- Choose the “Copy Image Address” option.
Step 4: Running the MidJourney Commands
MidJourney offers various commands for image modification. The video referred to two specific options, which we’ll now elaborate on.
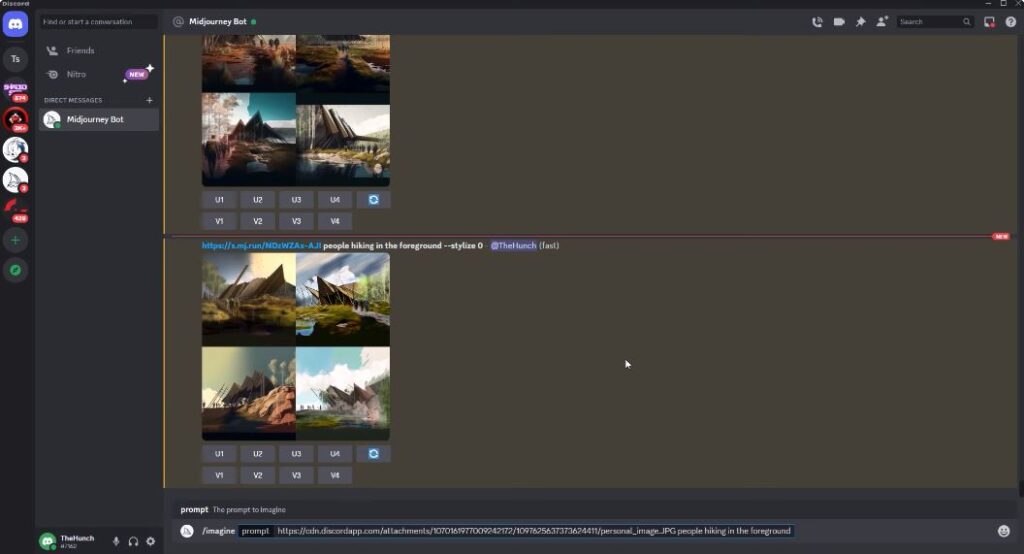
Option 1: Basic Transformation
- For a basic transformation, execute the following commands:
- Type “/imagine” to initiate the process.
- Paste the image URL (if available).
- Add a prompt, such as “people hiking in the foreground.”
- Press “Enter” to commence the transformation.
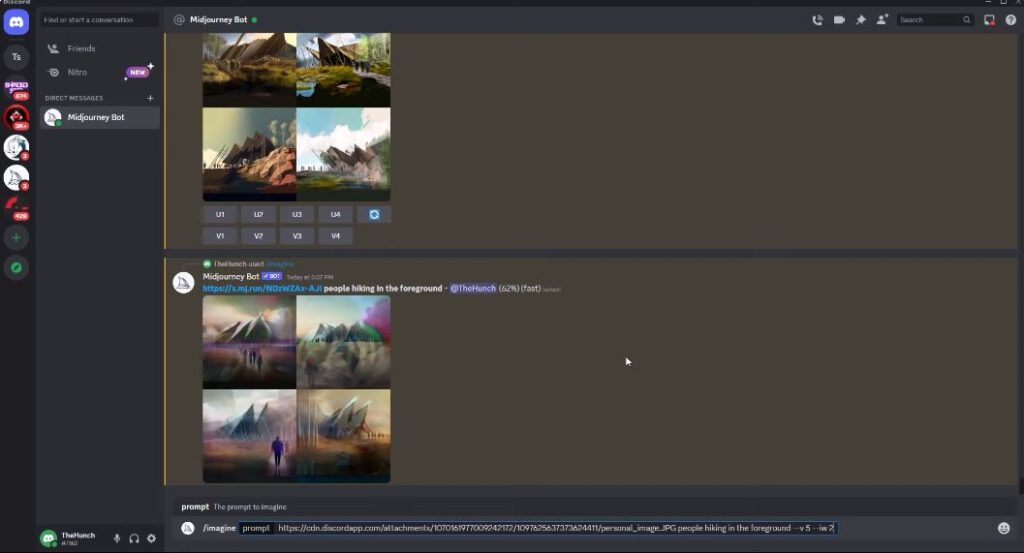
Option 2: Advanced Transformation
If you seek a more advanced transformation, you can use MidJourney’s Version 5 (V5) and fine-tune the image weight. Here’s how:
- Begin with “/imagine.”
- Paste the image URL.
- Add your prompt, e.g., “people hiking in the foreground.”
- Specify the version using “–V5.”
- Adjust the image weight by using “–IW 2” for maximum impact.
- Press “Enter” to begin the transformation.
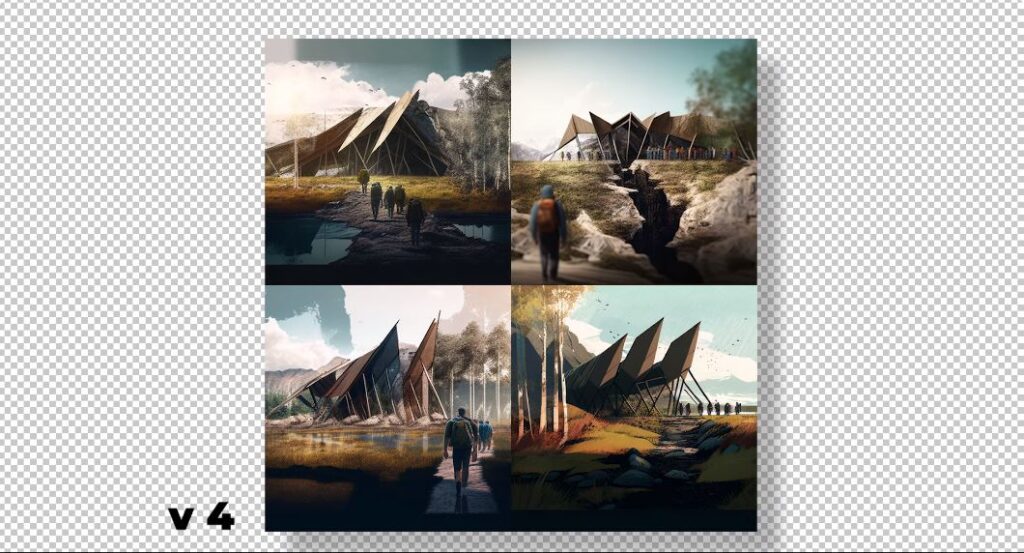
The advanced option utilizing Version 5 provides a photorealistic result, and the elevated image weight ensures a closer resemblance to the original image.
Useful tips for Midjourney image modification
1. Get Specific: Be clear and detailed in your prompts. The more specific, the better MidJourney understands what you want.
2. Keyword Magic: Use descriptive keywords to guide the style and feel of your image. Words like “surreal” or “vibrant” can work wonders.
3. Try Different Versions: Experiment with MidJourney’s different versions to find the one that suits your project best. Version 5 for realism, others for artistic twists.
4. Balance with Image Weight: Adjust the image weight parameter to control how much the AI changes your image. More weight for faithfulness, less for creativity.
5. Compare and Iterate: Run multiple iterations with variations in your prompts. Compare results to find the best match for your vision.
6. Baby Steps for Complexity: When you’re into complex compositions, modify one element at a time and combine them later for the big picture.
7. Artistic Lingo: Use art lingo in your prompts to guide the style – terms like “impressionist strokes” or “chiaroscuro lighting.”
8. Don’t Overload: Be clear but don’t overload the AI with details. Find the sweet spot between clarity and complexity.
9. Feedback is Gold: Give feedback and iterate. MidJourney learns from your input, so it’s a win-win.
10. Nature’s Touch: Adding nature? Use prompts like “integrate flowing water” or “soften with organic textures.”
11. Play with Color: Experiment with color schemes – try “vintage sepia tones” or “vibrant autumn colors” for mood.
12. Compositing: For complex compositions, create elements separately and composite them outside MidJourney.
13. Negative Space: Get creative with negative space by requesting prompts like “focus on minimalist design.”
14. Community Learning: Join the MidJourney community for insights and inspiration. Learning from others is a breeze.
15. Patience Pays: Sometimes, it takes a few tries to nail it. Be patient – refining your vision is all part of the fun.
Limitations of Midjourney image modification
MidJourney, while a powerful image modification tool, has its constraints as of version 5.2:
❌Inconsistent Character Style: Maintaining a consistent character or style across multiple renderings can be challenging.
❌Specific Detail Difficulty: Precisely setting specific details, like a monocle, is not always straightforward.
❌Composition Complexity: Creating intricate compositions, like scenes with multiple characters, can be difficult.
How to edit prompt in Midjourney for better image modification?
Editing prompts in Midjourney is like having a special tool for image editing or image modification.
It helps you tell the AI exactly what you want in a way it understands.
You can change the version, words, and how the image looks.
Editing prompts in Midjourney ultimately allows for a tailored and creative approach to image manipulation, ensuring that users can achieve their desired outcomes with precision and ease.
Follow the steps outlined below to learn how to do it:
Step 1: Accessing the Settings
To begin the prompt editing process, you need to access the settings in Midjourney. Follow these steps:
- Open Midjourney.
- Go to the messaging interface within the platform.
- Type “/settings” and press “Enter.”
Step 2: Check Your Version and Enable Remix Mode
Once you’ve entered the settings, the following commands will appear. To ensure that you can edit your prompt effectively, you must verify that the following settings are in place:
- MJ Version: Ensure that you are using version 3. This should be indicated by a green indicator.
- Remix Mode: Make sure that Remix Mode is also enabled (indicated by a green indicator).
Both of these options are crucial for successfully editing your prompts.
Step 3: Edit Your Prompt
Now that your settings are configured correctly, you can proceed to edit your prompt. Here’s how:
- Go to the image for which you want to change the prompt.
- Click on the “Make Variations” option.
- This will open the “Remix Prompt” window, where you can make adjustments to your prompt.
- In the “Remix Prompt” window, you can change your prompt text as per your requirements.
For example, if you want to change your prompt from version 3 to version 4 and adjust the aspect ratio to 1:1, you can simply input these changes in the “Remix Prompt” window.
Step 4: Submit Your Changes
After you’ve made the desired changes to your prompt, click on the “Submit” button. Midjourney will process your request and generate a new image based on the edited prompt.
Step 5: Review and Download
Once the AI has finished generating your image based on the edited prompt, you can review the results. If you are satisfied with the output, you can download it and use it as needed.
How to refine an image in Midjourney?
Refining images in MidJourney by Reroll, V-roll, and Remix feature is another way to edit or modify your images.
You can start by enabling Remix mode to use the Reroll feature.
If your initial image doesn’t match your vision, simply click “Remix” and explore new variations.
For fine-tuning, V-roll allows you to create different versions of an image, making subtle or dramatic changes.
Lastly, there’s Remaster, an experimental feature that enhances images in unpredictable ways.
Although there’s no set guide, you can experiment with parameters like -test and -creative.
MidJourney provides a playground for artistic exploration.
Final Thoughts
In conclusion, Midjourney AI is a fantastic tool for transforming your images into something truly unique.
You can enhance your architectural visuals and more with just a few clicks.
From basic tweaks to advanced adjustments, Midjourney’s got you covered.
And if you’re ever unsure about your prompt, remember, you can edit it to get exactly what you want.
So, dive in, have fun, and let your creativity soar with Midjourney!