What is Midjourney?
Midjourney is no doubt one of the best ai art generators that taps into the power of advanced technology called Generative Adversarial Networks (GANs) to create astonishing art.
This art can be based on either written descriptions or visual prompts you provide.
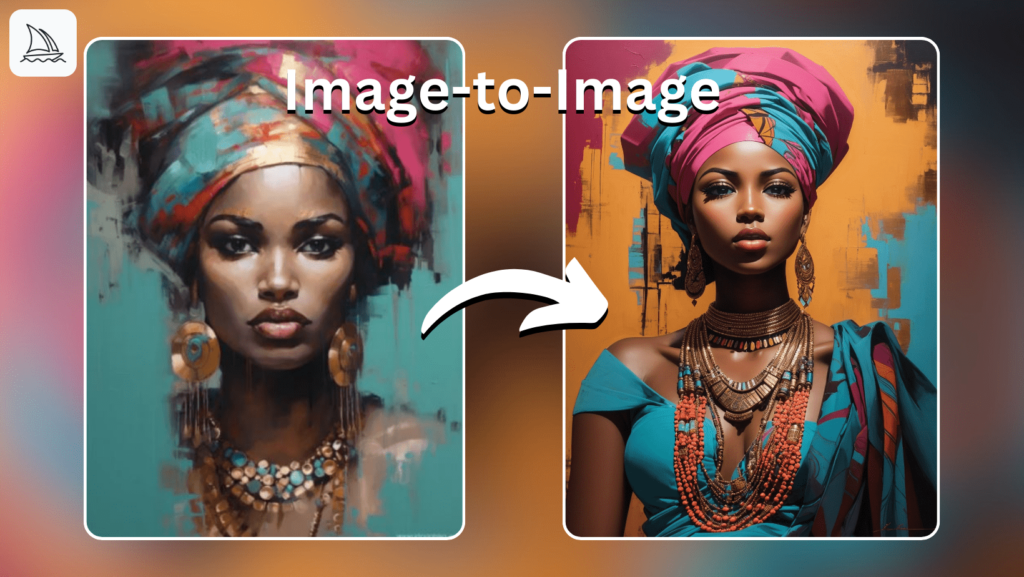
You can also upload reference photos in Midjourney to generate similar ai art.
The ai art it generates often surprises you because it goes beyond what you originally had in mind.
What’s particularly exciting about Midjourney is its ability to let you bring your own reference images to the table.
You can upload drawings, photos, or any other visual content that represents the style, colors, or overall vibe you want in your art.
This means you’re not just relying on the AI to come up with everything from scratch.
Instead, you get to blend your artistic vision with the AI’s creative prowess.
This opens up a whole world of imaginative possibilities.
It’s like collaborating with a digital art partner who understands your preferences and helps you bring your ideas to life in ways you might not have imagined.
So, let’s get straight into how to use reference photos in midjourney?
How to use reference photos in Midjourney?
Follow this step-by-step guide to know how you can actually use the reference image in midjourney and give the life to your imagination.
But before that one crucial thing to remember is that use relevant image as the reference image.
It means that if you want to generate images of a lady reading a book then upload an image of a lady first.
Step 1. Upload and Copy image link
First thing first, you’ll need to upload your reference image to midjourney through Discord. There are two main ways you can upload an image as a reference to midjourney.
1. Uploading Image from the web
Midjourney makes it super easy to use images directly from the web.
It’s like a shortcut to creativity! All you have to do is copy the web link of the image you like, and then paste it right into Midjourney.
Just remember, the web link should end with a format like .jpg, .png, or .gif.
2. Uploading Image from your computer
Now, if you’ve got your very own images that you want to work with, Midjourney is totally on board with that. Here’s how you can do it:
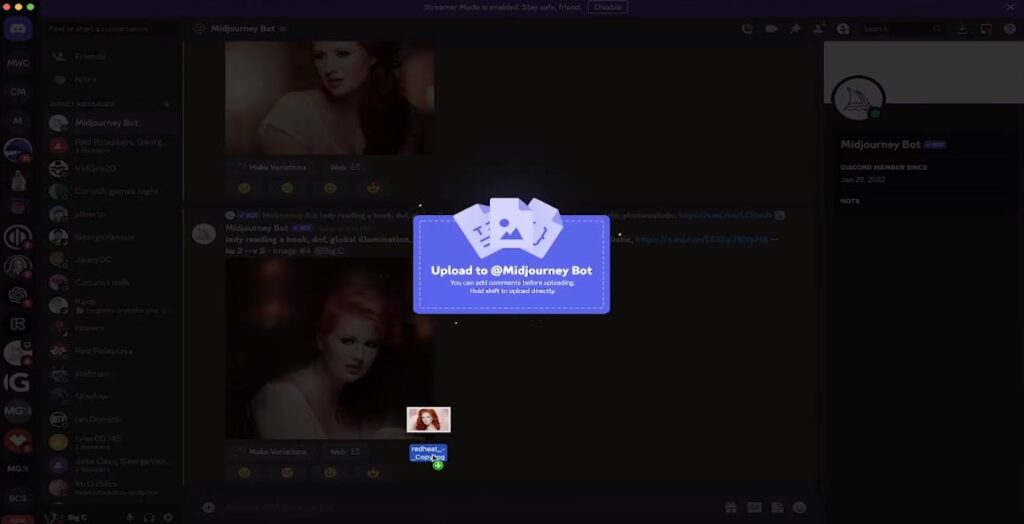
- Simply drag and drop your image file onto any of the newcomer channels on Midjourney. It’s as easy as moving a piece of paper onto a table!
- Hit that “Enter” button, and watch the magic happen as your image gets uploaded.
- Once your image is up there, click on it to see it up close and personal, just like you’re inspecting a piece of art.
- Right-click on the enlarged image, and you’ll see an option that says “Copy Link.” Click on that. You’ll need that later.
That’s it! Now you have a special web link for your image. You can use it as a starting point for making cool stuff on Midjourney. So, whether you’re getting ideas from the internet or showing off your own amazing pictures, Midjourney lets you be super creative and have lots of fun!
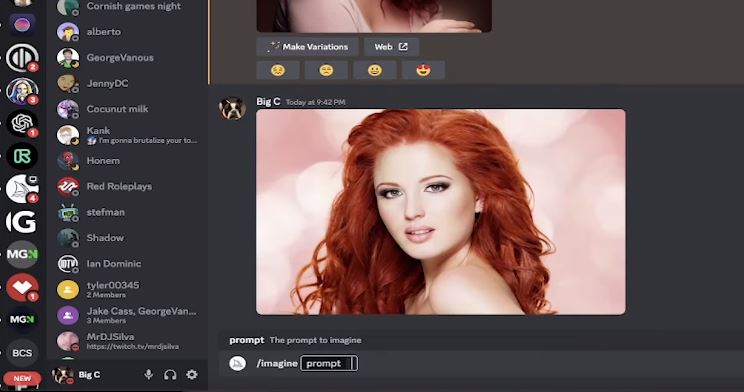
Step 2: Describe Your Vision
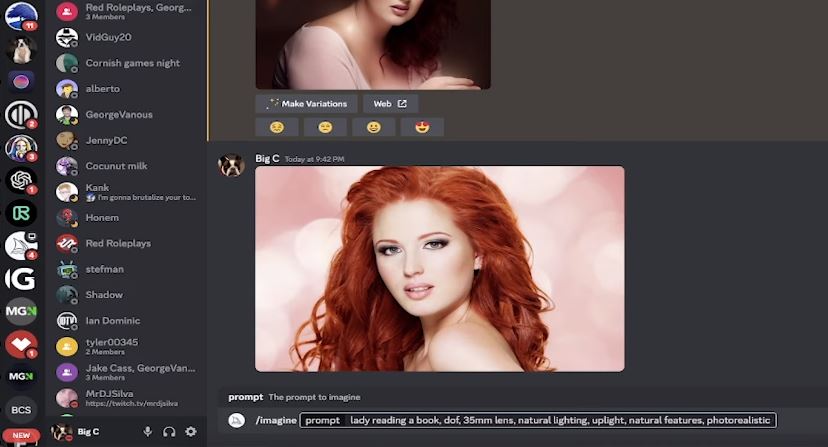
Time to describe what you want! First type “/imagine” then type in a description of what you want your artwork to look like.
You can write whatever you want. There is no limitation and you’re completely free to think creatively about your artwork.
Step 3: Set Some Parameters (Optional)
If you want to get specific, you can set some parameters like depth of field, lens type, lighting, and more.
These help fine-tune your art creation process. You can also specify that you want your art to be “photo realistic” if that’s the style you’re going for.
For example, you can write “Lady reading a book, dof(depth of field), 35mm lense, natural lighting, uplight, natural features, photo realistic“.
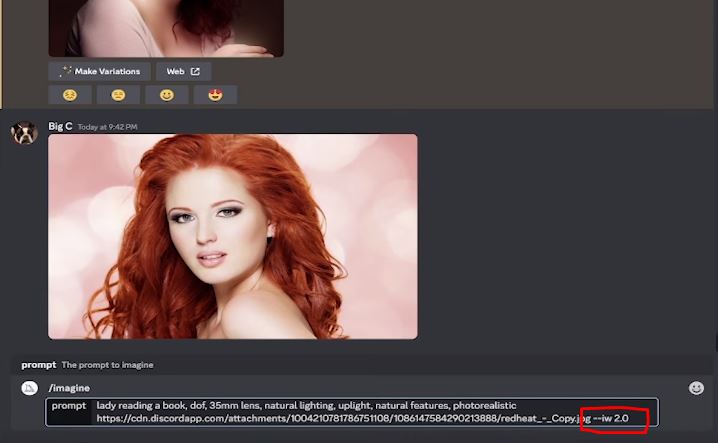
Once you’re done, press the “Space Bar” right after your prompt and then paste the link that you copied from the image.
Step 4: Adjust the Image Weight
Here’s a crucial step. To make your artwork resemble your uploaded image as much as possible, you can set the image weight.
You can simply type “–iw 2.0” which is the highest weight.
This means Midjourney will pay a lot of attention to your reference image when generating the art.
Step 5: Generate Your Art
Finally, hit enter! Midjourney will take all your instructions and create several versions of your artwork based on your description and reference image. You can choose the one you like the most.
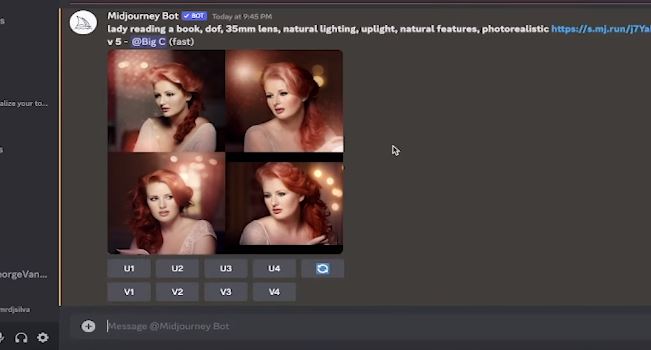
That’s it! You’ve successfully used a reference image to guide Midjourney in creating your art. It’s an amazing way to bring your creative ideas to life, and as you can see, the results can be astonishing.
But, not every time you use Midjourney and you’ll end up with a great piece of art.
There are occasions when you might not find the outcomes quite up to your expectations.
That’s where rerolling, v-rolling, and remastering step in.
These tools act as your creative helpers, allowing you to refine and enhance your images until they match your vision perfectly.
Using Rerolls, V-rolls, And Remaster to enhance the images.
Midjourney offers three awesome features: Reroll, V-roll, and Remaster.
Reroll lets you try different image variations, V-roll gives your images a makeover, and Remaster is an experimental feature that adds an element of surprise.
These tools make Midjourney a fantastic tool for creating unique and personalized animations and images.
So, why not give it a try and bring your creative ideas to life today?
1. How to Reroll an Image?
Step 1: Generate an Image with Midjourney using a prompt.
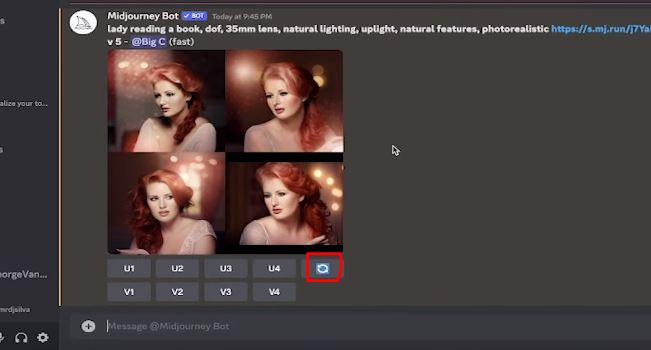
Step 2: If you’re not satisfied with the initial result, click on the “Reroll” button, which is often represented as a remix button.
Step 3: Midjourney will ask if you want to make any changes to your prompt. You can decide if you want to modify it or keep it the same.
Step 4: Reroll Results: Midjourney will generate a new image based on your prompt or any changes you made. You can repeat this process until you’re happy with the result.
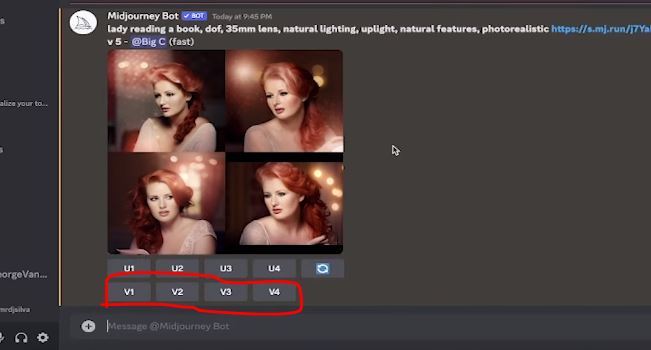
2. How to V-Roll an Image?
Step 1: Generate an Image with Midjourney using a prompt.
Step 2: After the image is generated, you’ll see V-roll buttons, often labeled as variations like V1, V2, V3, etc.
Step 3: Click on the V-roll button that corresponds to the version you prefer.
Step 4: V-Roll Results: Midjourney will generate variations of the original image based on your selection. You can choose the one that best fits your needs.
3. How to Remaster an Image?
Step 1: Generate an Image with Midjourney using a prompt.
Step 2: To remaster an image, you can experiment with parameters like -test and -creative within your prompt. There is no specific key or mode for remastering; it’s about trying different settings.
Step 3: Review the Remastered Image: Once you’ve generated an image with your remastering settings, examine the result to see how it differs from the original.
Using “/blend” and “/imagine” commands for the best results.
Using Midjourney commands is like adding the cherry on top when it comes to interacting with the Midjourney AI bot on Discord.
These commands let you do all sorts of cool stuff, like creating images, tweaking default settings, keeping an eye on user profiles, and even handling other nifty tasks.
You can use these commands in any bot-friendly channel on your private Discord server or simply shoot a direct message to the bot.
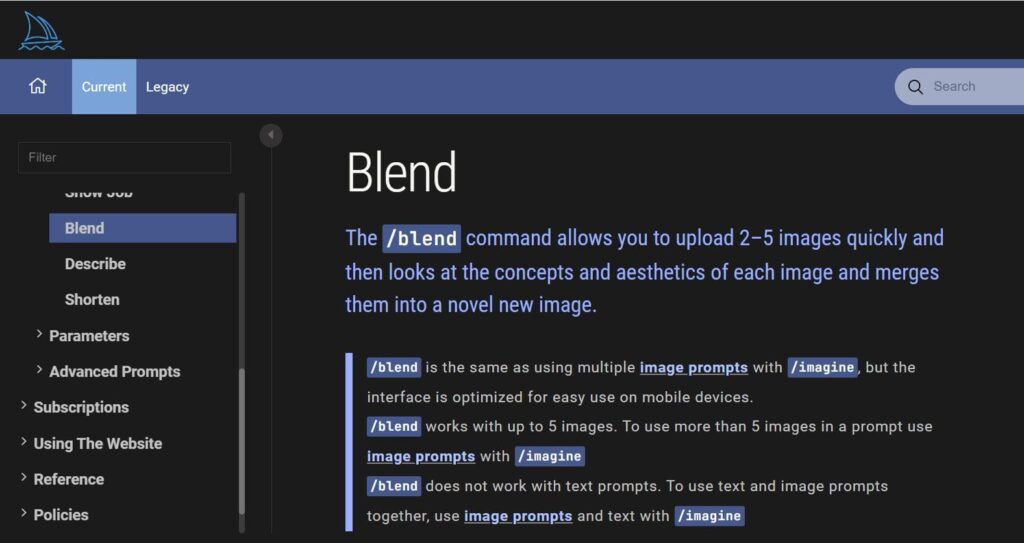
1. /Blend command
The /blend command allows users to upload 2 to 5 images, which are then analyzed for their concepts and aesthetics.
The command merges these images into a unique, new image.
It’s particularly optimized for mobile device use and offers flexibility in aspect ratio options, including square (1:1), portrait (2:3), or landscape (3:2).
It’s important to note that /blend doesn’t work with text prompts; for combining text and images, users should utilize image prompts with the /imagine command.
For optimal results, it’s recommended to upload images with the same aspect ratio as the desired outcome.
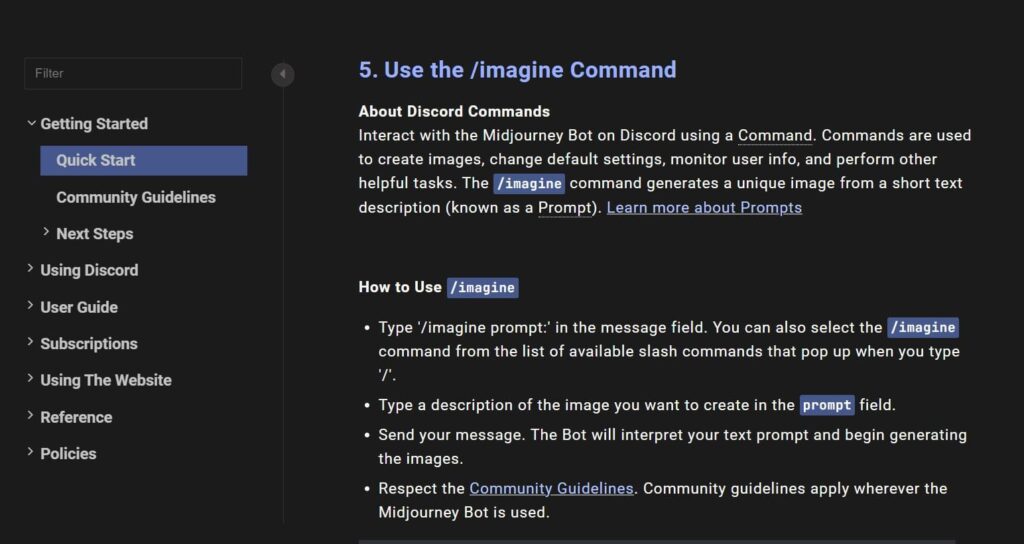
2. /Imagine command
The /imagine command in Discord lets you create unique images based on a brief text description called a Prompt.
To use it, simply type ‘/imagine prompt:’ followed by your image description, and then send the message.
The Midjourney Bot will then take your text description and start generating the images for you.
It’s a handy feature for quickly visualizing your ideas in Discord, but always remember to follow the community guidelines wherever you’re using the Midjourney Bot.
Conclusion
In a nutshell, Midjourney is an amazing AI images generator that helps you turn your ideas into stunning artworks.
Whether you provide written descriptions or visual prompts, it uses its creative AI magic to surprise you with unique creations.
What sets Midjourney apart is that you can bring your own reference images into the mix, giving you a chance to blend your artistic vision with the AI’s talent.