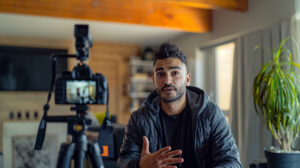


Introduction
So, you’ve just captured some awesome drone footage, and now you’re wondering how to turn those raw clips into something that looks professional and jaw-dropping. That’s where post-processing comes in! Whether you’re filming stunning landscapes, real estate tours, or action-packed events, post-processing drone footage is the secret sauce to making your videos stand out. In this guide, I’ll walk you through everything you need to know to polish your drone footage like a pro. Let’s dive in!
What Is Post-Processing Drone Footage?
Post-processing is like giving your drone footage a glow-up. It’s the step where you take your raw video files and tweak them to enhance colors, fix lighting, add effects, or even stitch together images for maps or 3D models. Think of it as editing a photo, but for videos or images captured by your drone. The goal? Make your footage look amazing and serve its purpose, whether that’s for a YouTube vlog, a client project, or a mapping job.
Why does this matter? Raw drone footage can sometimes look flat or dull straight out of the camera. Post-processing helps you fix issues like shaky footage, bad lighting, or washed-out colors. Plus, it lets you add your creative touch to make the footage feel unique.
Why Post-Processing Drone Footage Is a Game-Changer
Before we get into the how-to, let’s talk about why post-processing is worth your time:
- Better Visuals: Adjust colors, contrast, and brightness to make your footage pop.
- Professional Touch: Even basic edits can make your work look polished and high-quality.
- Fix Mistakes: Shaky footage? Overexposed shots? Post-processing can save the day.
- Meet Client Needs: If you’re working on real estate, surveying, or inspections, post-processing ensures your output meets specific requirements, like detailed maps or 3D models.
- Stand Out Online: Eye-catching videos rank better on YouTube, Vimeo, or social media, helping you attract more views.
Now, let’s get into the nitty-gritty of how to post-process your drone footage like a pro.
Step-by-Step Guide to Post-Processing Drone Footage
1. Organize Your Footage
First things first, get your files in order. After a drone shoot, you might have tons of clips and images. Here’s what to do:
- Sort Your Files: Create folders for each project and label them clearly (e.g., “Beach Shoot 2025”).
- Backup Everything: Save your raw footage on an external drive or cloud storage like Google Drive or Dropbox. Trust me, you don’t want to lose your hard work!
- Pick the Best Clips: Go through your footage and select the clips that tell your story or meet your project’s goals. Delete any blurry or unusable shots.
2. Choose the Right Software
The software you use depends on what you’re trying to achieve. Here are some popular options for post-processing drone footage:
- Video Editing:
- Adobe Premiere Pro: Great for professional video editing with tons of features.
- DaVinci Resolve: Awesome for color grading and free for basic use.
- Final Cut Pro: A favorite for Mac users, super intuitive.
- iMovie: Perfect for beginners or quick edits on a Mac.
- Photo Editing:
- Adobe Photoshop: Ideal for tweaking individual drone images.
- Lightroom: Great for batch-editing photos and adjusting colors.
- Mapping & 3D Modeling:
- Pix4D: Perfect for creating maps or 3D models from drone footage.
- DroneDeploy: Easy-to-use software for mapping and surveying.
- Agisoft Metashape: Advanced tool for photogrammetry and 3D reconstruction.
Pick software based on your skill level and project needs. If you’re new, start with free tools like DaVinci Resolve or iMovie before investing in paid ones.
3. Basic Video Editing Tips
Let’s start with editing your drone videos. Here’s how to make them shine:
Trim and Cut
- Chop off any unnecessary parts, like takeoff or landing footage.
- Keep your video concise to hold viewers’ attention. Aim for 2-5 minutes for most projects unless it’s a longer documentary-style video.
Stabilize Shaky Footage
- Drones can sometimes produce wobbly videos, especially in windy conditions. Most editing software has stabilization tools to smooth things out.
- In Adobe Premiere Pro, try the “Warp Stabilizer” effect. In DaVinci Resolve, use the “Stabilization” feature under the “Transform” tools.
Adjust Colors and Lighting
- Brightness and Contrast: If your footage looks too dark or flat, bump up the brightness and contrast slightly.
- Color Grading: Add a cinematic look by tweaking the color balance. For example, boost blues for sky shots or greens for forest footage.
- White Balance: Fix any color tints (like overly blue or yellow shots) to make your footage look natural.
Add Transitions
- Use smooth transitions like fades or dissolves between clips to keep the flow natural.
- Avoid overusing flashy transitions—they can look cheesy!
4. Enhance Audio
Don’t forget the sound! Drone footage often lacks audio since drones don’t record sound well. Here’s how to fix it:
- Add Background Music: Choose royalty-free music from sites like Epidemic Sound or Artlist. Make sure it matches the mood of your video (e.g., upbeat for action shots, calm for nature scenes).
- Sound Effects: Add subtle effects like wind or birds chirping for outdoor scenes to make the video immersive.
- Balance Audio Levels: Ensure the music doesn’t drown out any voiceovers or key sounds.
5. Advanced Post-Processing for Drone Footage
If you’re working on specialized projects like real estate, agriculture, or surveying, you might need advanced post-processing techniques. Here are a few:
Photogrammetry for 3D Models
- Photogrammetry uses multiple drone images to create 3D models or maps. Tools like Pix4D or Agisoft Metashape can stitch images together to build accurate models.
- This is super useful for construction, archaeology, or real estate to showcase properties in 3D.
Orthomosaic Mapping
- For surveying or agriculture, you can create 2D maps from drone images. Software like DroneDeploy corrects for lens distortion and stitches images into a seamless map.
- These maps are great for monitoring crops, planning construction, or analyzing land.
Color Correction for Consistency
- If you’re shooting over multiple days, lighting can vary. Use color grading tools to ensure all clips look consistent, especially for professional projects.
6. Exporting Your Footage
Once your edits are done, it’s time to export. Here’s how to get it right:
- Choose the Right Format: MP4 is the most universal for videos. For images, use JPEG for smaller files or PNG for higher quality.
- Resolution: Export in 4K if your drone supports it, especially for professional work. For social media, 1080p is usually fine.
- File Size: Compress your file if you’re uploading online to save bandwidth without losing quality. Tools like HandBrake can help.
7. Optimize for SEO (Yes, Even Your Video!)
If you’re sharing your drone footage online (YouTube, Vimeo, or your website), SEO is key to getting it seen. Here’s how to optimize your video:
- Title: Include your main keyword, “Post-Processing Drone Footage,” in a catchy title. Example: “How to Post-Process Drone Footage for Stunning Results.”
- Description: Write a detailed description (200-300 words) with related keywords like “drone video editing,” “color grading drone footage,” or “drone mapping software.”
- Tags: Add relevant tags like “drone editing tips,” “post-processing tutorial,” and “drone cinematography.”
- Thumbnail: Create a custom thumbnail that’s bright and eye-catching. Use tools like Canva for quick designs.
- Subtitles: Add captions to make your video accessible and improve SEO. YouTube’s auto-captions are a good start, but edit them for accuracy.
Common Mistakes to Avoid
- Over-Editing: Too many effects or filters can make your footage look amateurish. Keep it simple.
- Ignoring Audio: Bad sound can ruin great visuals. Always check your audio quality.
- Skipping Stabilization: Shaky footage is a big turn-off. Always stabilize when needed.
- Not Backing Up: Always save your raw files before editing. You never know when you’ll need them!
Pro Tips for Next-Level Drone Footage
- Learn Your Drone’s Settings: Before you even start post-processing, tweak your drone’s camera settings (like ISO, shutter speed, or white balance) to get better raw footage.
- Practice Color Grading: Watch YouTube tutorials on color grading in DaVinci Resolve or Premiere Pro to add a cinematic vibe.
- Stay Legal: Make sure your drone footage complies with local laws, especially if you’re using it commercially.
- Test Different Software: Try free trials of tools like Pix4D or Adobe Premiere to find what works best for you.
Wrapping It Up
Post-processing drone footage is all about taking your raw clips and turning them into something special. Whether you’re editing a cinematic travel video, creating a 3D model for a client, or mapping a field, the right tools and techniques can make a huge difference. Start with organizing your files, pick the right software, and don’t be afraid to experiment with colors, transitions, and effects. With a little practice, you’ll be creating videos that wow everyone who sees them.